Battery life is one of the important criteria you must test during IoT (Internet of Things) development. Not measuring the energy consumption of your platform can lead to potential issues:
- User dissatisfaction
- Decrease in battery lifespan
- Increase in platform maintenance cost
So, how can you measure energy?
We explained several times on this blog how to measure energy with software only, especially on Android. But measurement on IoT platforms is not so simple: there is no embedded energy probe, no API… You will need to conduct hardware measurements.
Electrical explanations
In order to measure energy consumption, you need to use a shunt. A shunt is a resistor which you put in your electronical circuit: when current go through the little value resistor, a differential voltage is created. Energy can be calculated with the Ohm law : Power = Voltage x Current.
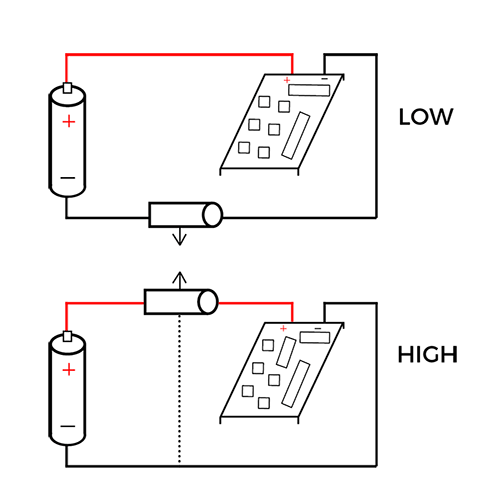
There are two ways to integrate this shunt: high side and low side. High or low depends on where you put the shunt, depending on your battery or power inside. “High” is between the positive point of the battery and your load (your platform) and “Low” is between the battery ground and the ground of your platform.

Low side is simpler but presents some drawbacks, especially the platform with switching loads which create ground loop problems. It is generally the case for IoT, with sensor, controller etc… So let’s go for a measurement of the High side.
Rapid measurement of an IoT platform
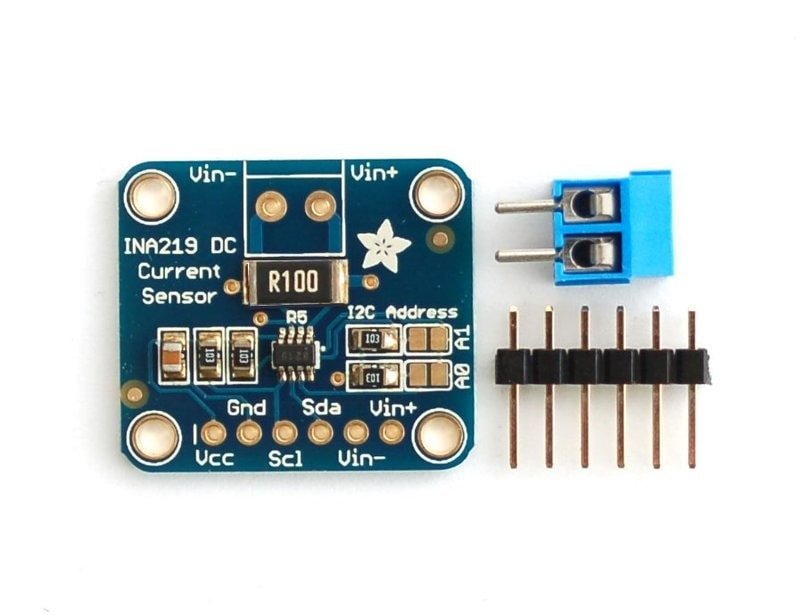
Arduino provides a tutorial for measuring energy with an INA219 breakout board, with a 1 % precision.

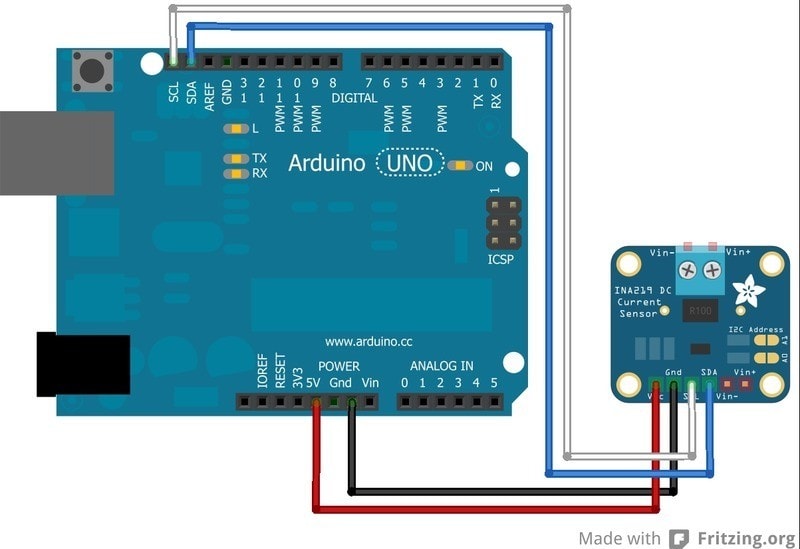
Wiring is really simple if you use a breadboard and follow the Adafruit tutorial.

To test the installation, you can run an example. You will get four information:
- Bus Voltage: this is the total voltage seen by the circuit under test. (Supply voltage – shunt voltage).
- Shunt Voltage: the shunt voltage!
- Current : the current derived via Ohm law and the voltage measurement
- Load Voltage : the overall voltage
Measuring an IoT object
Now we can integrate the IoT platform, for that we have chosen a Raspberry. It is pretty amazing to measure a Raspberry with an Arduino!
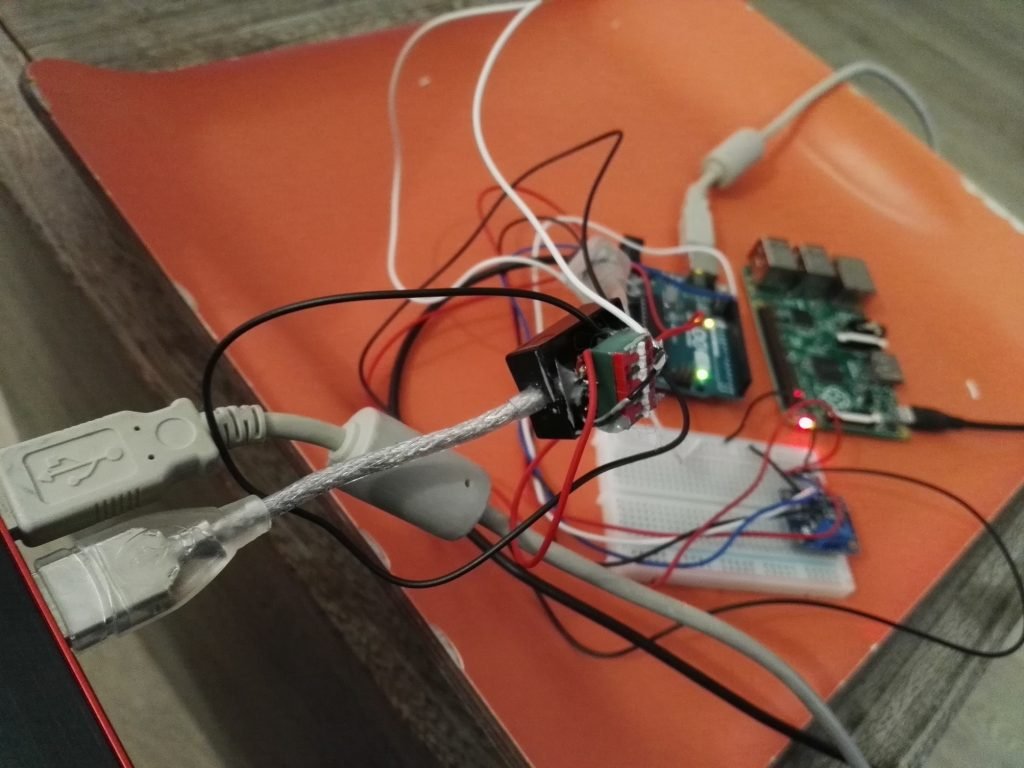
The first difficulty is to insert the shunt between the battery’s positive power point and the Raspberry’s Vin. First possibility: you integrate it directly on the Raspberry board, by cutting the circuit. We chose a less intrusive possibility, by integrating it in the power cable. Raspberry is powered by the USB and we need to put the shunt between the V+ of the computer and the V+ of the Raspberry :

In real life, it gives:

You now have to run the code example and obtain the platform current and voltage!
For a Raspberry with no configuration (No OS, no card), I obtained an average of power of 230 mW.
Then, you only have to get your projects measures started! As an example, here is how I conducted the measurement of an Arduino weather station.

